Again and again, you see breathtaking landscapes and ask yourself on how to achieve this quality in your pictures as well? My name is Chantal Lichtenberg from NiSi Filter Germany and I will explain everything you need to know about using filters to improve the quality and versatility of your photos.
The use of filters is particularly popular for landscape photographers, for example, to deal with high dynamic ranges and to achieve or underline various image effects.
There are many different types of filters, properly used they can improve your photos or achieve a certain image effect. In this article, I would like to tell you a bit about the most important filter variants. I show you in which situations which filters make sense and how you optimize your photographs. I also explain what needs to be considered when working with filters and which are the best filters for landscape photography. Filters come in all sizes and quality standards. We want to deal with this topic first. It is important to understand that every filter that is placed in front of a lens has an influence on the optical performance of your lens. That is why it is important to pay attention to the quality of the filter. Your lens is worth only as much as the filter you combine it with.
Glass or resin filters?
Most filters are made of resin (plastic) or optical glass. The first difference is the price: Resin filters are much cheaper than filters made of optical glass. But is it worth investing in glass filters? Definitely! In order to not affect the quality of your high-end lens, you must also pay attention to the quality of the filters. Resin filters usually scratch faster than glass filters and often produce a red or blue color cast. Bad resin filters can even cause loss of quality such as less sharpness in your image. So what are the advantages of optical glass filters? Optical glass is the best material for making photography filters, as it is the same material from which the highest-quality photo lenses are made. No matter which filter you buy, make sure that they are made of high-quality glass. Through various surface finishes, such as nano-coating, an infrared-cut coating, and an anti-reflection treatment, good photo filters can offer the highest quality and color neutrality. Thanks to the nano-coating, the filters can be cleaned very easily and quickly. All of these little things affect the price but if properly handled, good glass filters last forever and are therefore worth their money. For this reason, NiSi only produces glass filters, because for NiSi the product quality has the highest importance.

What filters do I use for landscape photography?
Polarizing filter / CPL / polarizer
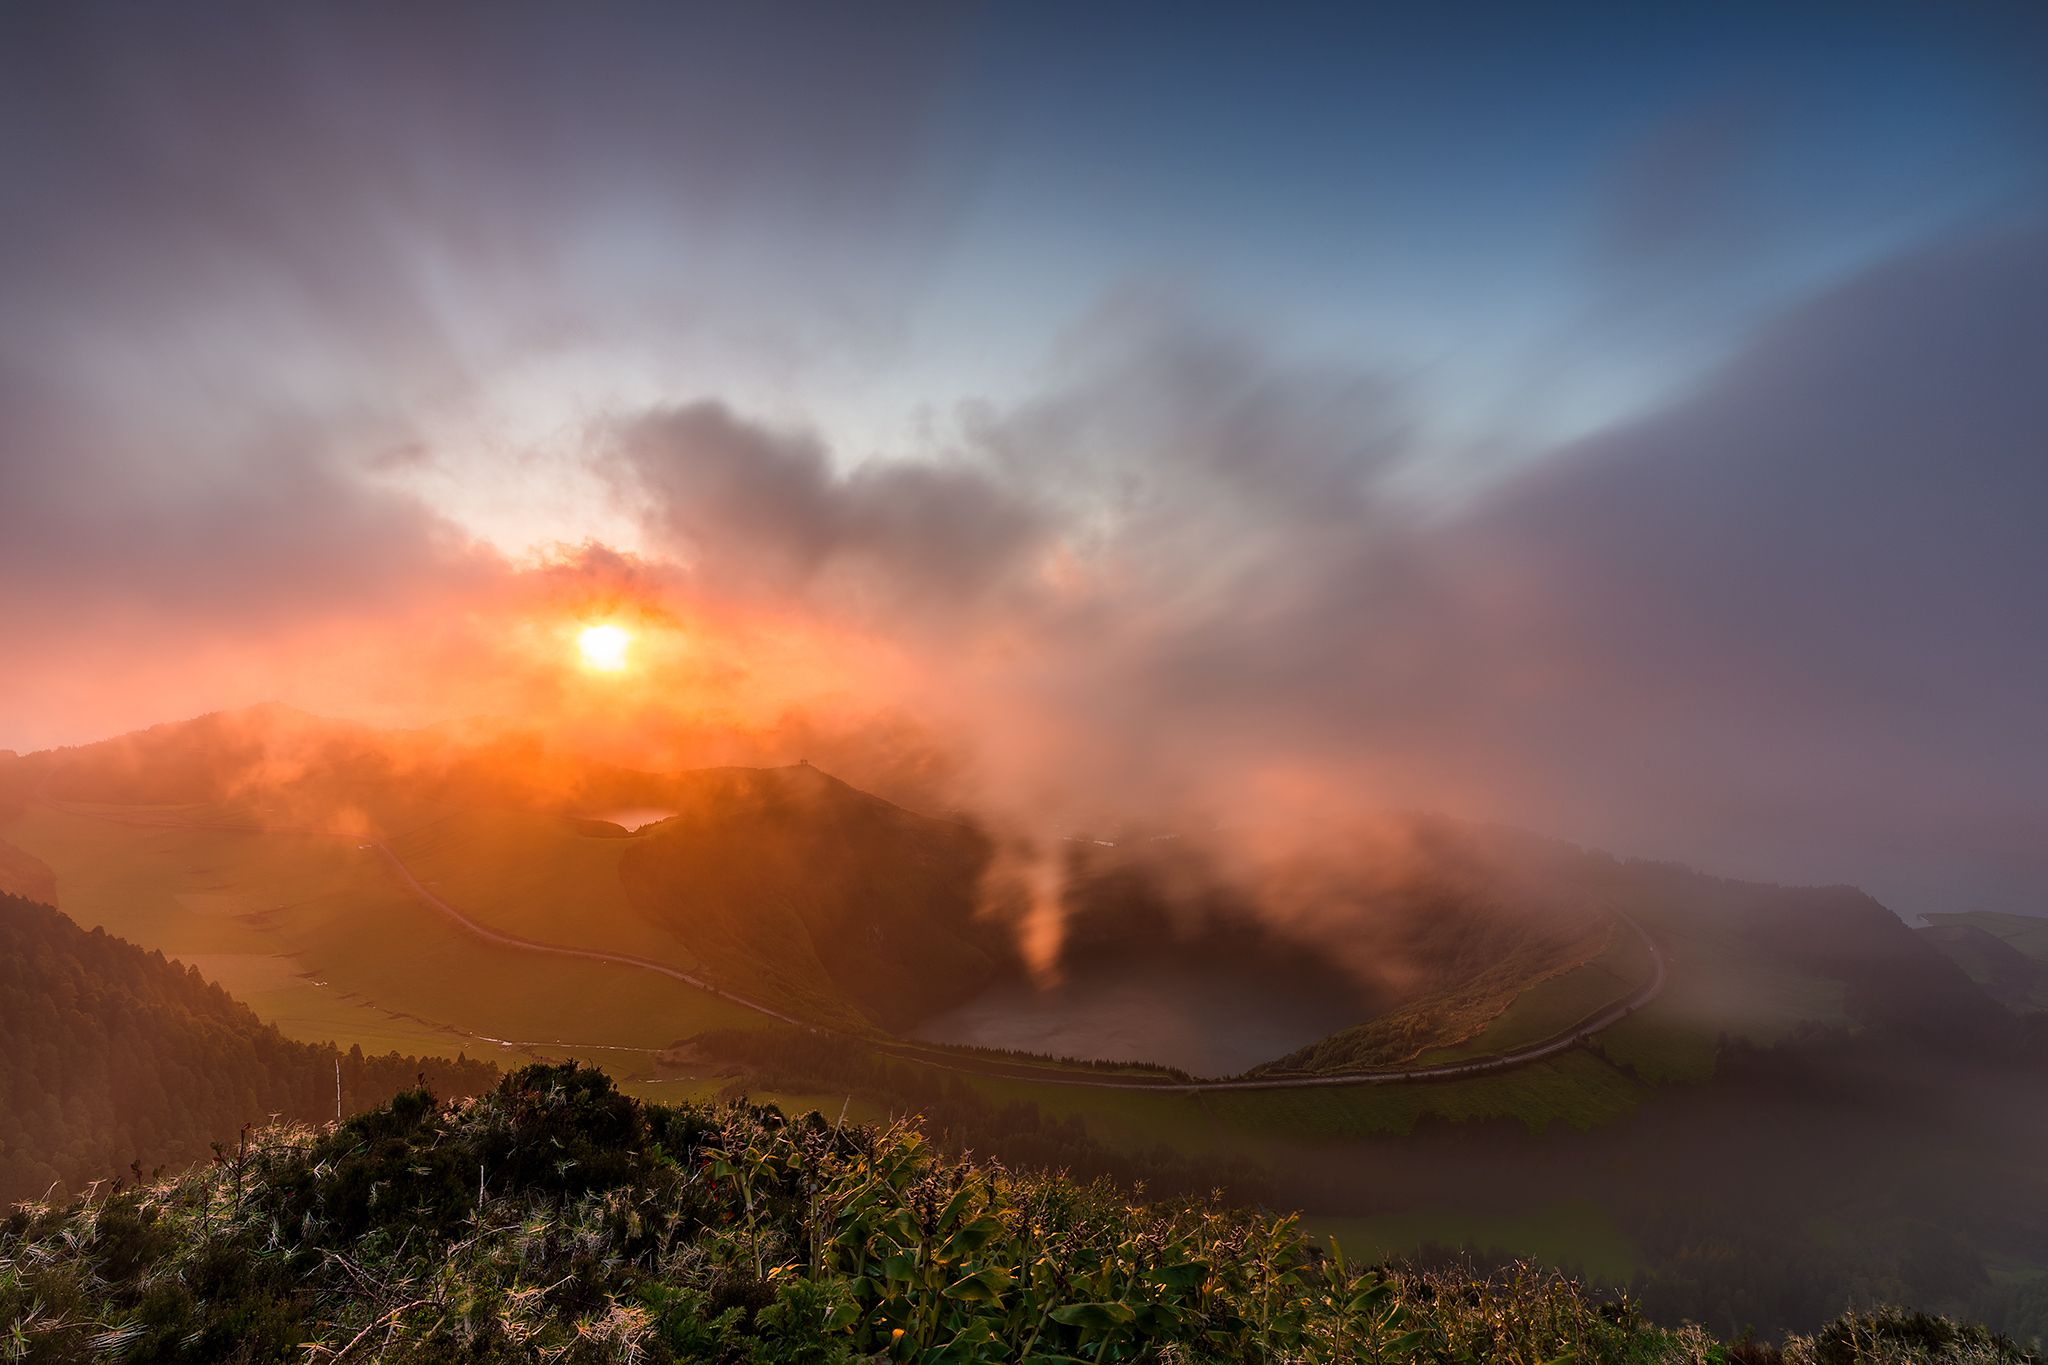
A polarizing filter should not be missing in any camera kit. If the filter is used at an angle of 90 degrees to the sun, it has its strongest effect visible and gives the image more contrast. The sky turns dark blue and it brings out the clouds much more in front of the sky. The green of forests and leaves becomes more saturated because the polarizing filter cuts out disturbing reflections. Another example of the great effect of the polarizing filter can be clearly seen when taking pictures of the sea or generally water surfaces. You can reduce disturbing reflections or remove them entirely. This way, things that are below the water's surface come out clearly visible. As you can see, by using a polarizing filter you can achieve an interesting image look without any post-processing.

Without using a Polarizer.

With NiSi Landscape Polarizer - The difference is subtle but nicely visible in the water where much more details below the surface are visible and the extremely bright reflection of the sun is removed entirely.
Neutral density filter / grey filter / ND filter
What does "ND filter" mean? The abbreviation stands for “Neutral Density”. The ND filter reduces the light intensity that comes through the lens onto your sensor or film. In my opinion, ND filters are one of the most creative tools in landscape photography. ND filters reduce the incidence of light and thereby extend the exposure time. Through the targeted use of specific exposure times, you can give the picture a very special effect and make it more interesting. There are no limits to your creativity. Long exposures affect many different things.
When used on a waterfall, the neutral density filter makes the water look silky. The same principle applies to Seascape photography. Landscape photographers love cloudy days. Why? A cloudy sky looks much more dramatic than a cloudless blue sky. A cloudy sky becomes really alive if you choose a longer exposure time. The choice of the right ND filter depends on the situation. If it is quite windy, I can use a weak ND filter because the movement of the clouds through the wind is very intense. On a less windy day, choose a stronger ND filter. Of course, the lighting situation and the time of day also play an important role here. In simple terms, I can say that I use neutral density filters in the following strengths when I take pictures at sunrise and sunset: ND8 / ND64 / ND1000. These filters reduce the light by 3/6/10 stops. For long exposure shots during the day, you should choose a stronger ND, like the ND32000 filter with 15 f-stops.
ND filters can do even more! Let moving visitors in a public place disappear. Or use ND filters when shooting road traffic in the twilight phase to capture the light trails of the vehicles. An ND filter is also very useful for thunderstorm recordings during the day. Lightning is very bright, so it is sometimes necessary to fade down to extremely high f-numbers. To avoid this, I also use my neutral density filters.
Many people think that some of these effects can only be achieved in digital image processing when they see photographs like this. The technique is very simple and is achieved directly in the camera thanks to the use of ND filters, i.e. without the need for post-processing. But how do I calculate the correct exposure time? There are now many smartphone apps that can help you choose the right exposure time. You can, of course, calculate this yourself, but for all of us who are not math geniuses, the easiest way is to use an app.

Without using an ND Filter.

With NiSi ND8 0.9 filter (3 stops).
Graduated ND filter / GND filter / ND-grad
GND filters are filters that are darkened at one end and transparent at the other end. In the middle of the filter, there is a transition between the two, from dark to clear. This gradient transition varies depending on the type of GND filter. These filters are used to compensate for the exposure of a scene, which mostly consists of a bright section (sky) and a darker section (foreground). The human eye is able to visualize a wide range of light and shadow. This is known as the "dynamic range" of a scene. Unfortunately, the camera sensor technology is not yet able to capture the dynamic range as the human eye can see it. Therefore, using GNDs helps to capture the dynamic range of a scene with a single photograph, rather than combining multiple shots with different exposure times.
The intensity of blocked light for a GND filter uses the same terminology as described for ND filters. There is a slight difference that the strength given only refers to the darkest part of the filter. Most GND filters have the darkest part of the filter at the top of the gradient filter. There are different types of graduated transitions from dark to clear, for example, there are filters with a very soft or a hard transition.

Left: Without Filter / Right: With NiSi GND8 0.9 Medium filter (3 stops) - The big difference is visible in the sky where the left part of the photo lost all the details in the clouds resulting in just white parts because they are too bright.
What are the different types of GND filters and when should I use them?
Soft GND filters have a very smooth transition from dark to clear. This type of filter is best suited for scenes that have a large transition from the foreground to the sky. The best examples of scenarios in which a soft GND makes the most sense are alpine landscapes with mountains that cross the horizon line or dramatic rock formations in a marine landscape. These filters are also preferred when shooting away from the direct light source.
Hard GND filters have a sharp transition from dark to clear. This type of filter is best suited for scenes that have a clearly visible transition from the foreground to the sky. It is best used in landscapes where no elements protrude above the horizon, such as shots by the sea with a view of the open ocean. They can be used wherever a hard transition is needed, even against the sun. When photographing away from the direct light source, they can create very atmospheric and dramatic skies. Avoid this filter if objects protrude beyond the horizon, as these objects can appear very dark in your photo above the transition.
Reverse GND filters with a "reverse transition" are similar to the GND with a hard transition, except that the darkest part of the filter is at the transition point. These filters are specially designed to photograph against the sun on the horizon where the light is strongest and weakens towards the sky.
Medium GND filters are similar to the graduated ND with a soft transition, but the gradient edge is not quite as soft at the Medium GND. These filters are very versatile and can be used in most situations to take photos against the sun or away from the sun. Objects that protrude above the horizon line can be darkened by this filter, but mostly not so obvious and strong as with the Hard GND.
Night filter / Astro filter
Whether for cityscape or astrophotography photography: light pollution quickly affects the quality of your photos. Let's not talk about the long post-processing that follows to correct and alleviate this problem. Therefore NiSi has developed the Natural Night Filter, which blocks certain wavelengths of the light spectrum that usually cause that light pollution. These are primarily the wavelengths of mercury vapor lamps, sodium lamps, and other street lamps. The Natural Night filter is available in all sizes for NiSi filter holders and also as a circular screw filter.

Left: Without Filter / Right: With NiSi Natural Night Filter - The difference is easy to see and saves a lot of time in post-processing and figuring out the correct colors if that's even possible.
Circular screw filters or square filter system?
Almost every landscape photographer asks himself this question over time. Almost everyone begins with the use of circular screw filters. These screw filters are available in many different sizes. The corresponding filter diameter is noted on most lenses.
Screw-on filters are usually cheaper than rectangular slot-in filters, but they also have disadvantages: Not all lenses have the same filter diameter. So there is the possibility to buy filters in different diameters or you can use a filter for the largest existing filter diameter and adapt it to the other lenses with the help of step-up rings.
Another disadvantage is that they can not be used on lenses with a curved front lens, for example, the popular Nikon 14-24mm/2.8.
If you want to combine the effect of several filters (e.g. ND filter + polarizing filter), these filters must be screwed on top of each other, which can quickly lead to vignetting and, on the other hand, the filters tilt and stick together. Of course, there are advantages to using circular filters. They are cheap, very light, and have a small packing size.
So what are the advantages of a slot-in square filter system?
Filter systems for rectangular filters offer considerably more flexibility. By using a filter holder that is attached to the lens, you can use several filters at the same time without vignetting. This type of system also offers the use of graduated ND filters (GND filters), which are particularly popular in landscape photography.
Appropriate adapter rings make it possible to use the same filter holder on different lenses. NiSi offers the V6 filter holder, which has an integrated polarizing filter that can be rotated by small wheels while all other filters can stay in place in front of the polarizer. The holder is made of aviation-grade aluminum, milled from a single block, and coated with a matt black surface finish to effectively prevent reflections. Up to 3 rectangular filters (100x100mm or 100x150mm) and a circular polarizing filter can be used together without any vignetting at 16mm full-frame. The holder can be rotated 360° and is compatible with common filter threads from 49mm to 95mm. The great advantage of these filter holder systems is obviously the possibility of using graduated filters and on the other hand the handling of very strong ND filters. The holder with filters can be removed and reassembled very easily so that you can change the composition or focus.
Final Words & Discount Code
In the end, the choice of the right system is always a matter of taste and, of course, it always depends on the requirements of the individual photographer. I hope I was able to introduce you to filter photography with this article. I and the NiSi Filter Germany team will be happy to help you with any further questions in the comments below.
If I have now made you want to expand your photography equipment, I have a discount code for you with which you can save up to 10% on your next purchase at www.nisioptics.de. Simply enter the discount code "bonsai-rabatt" in the coupon field in the cart when processing your order.
Are you ordering from Italy? Simply go to www.nisifilters.it and use the discount code "bonsai-sconto".


Comments (3)