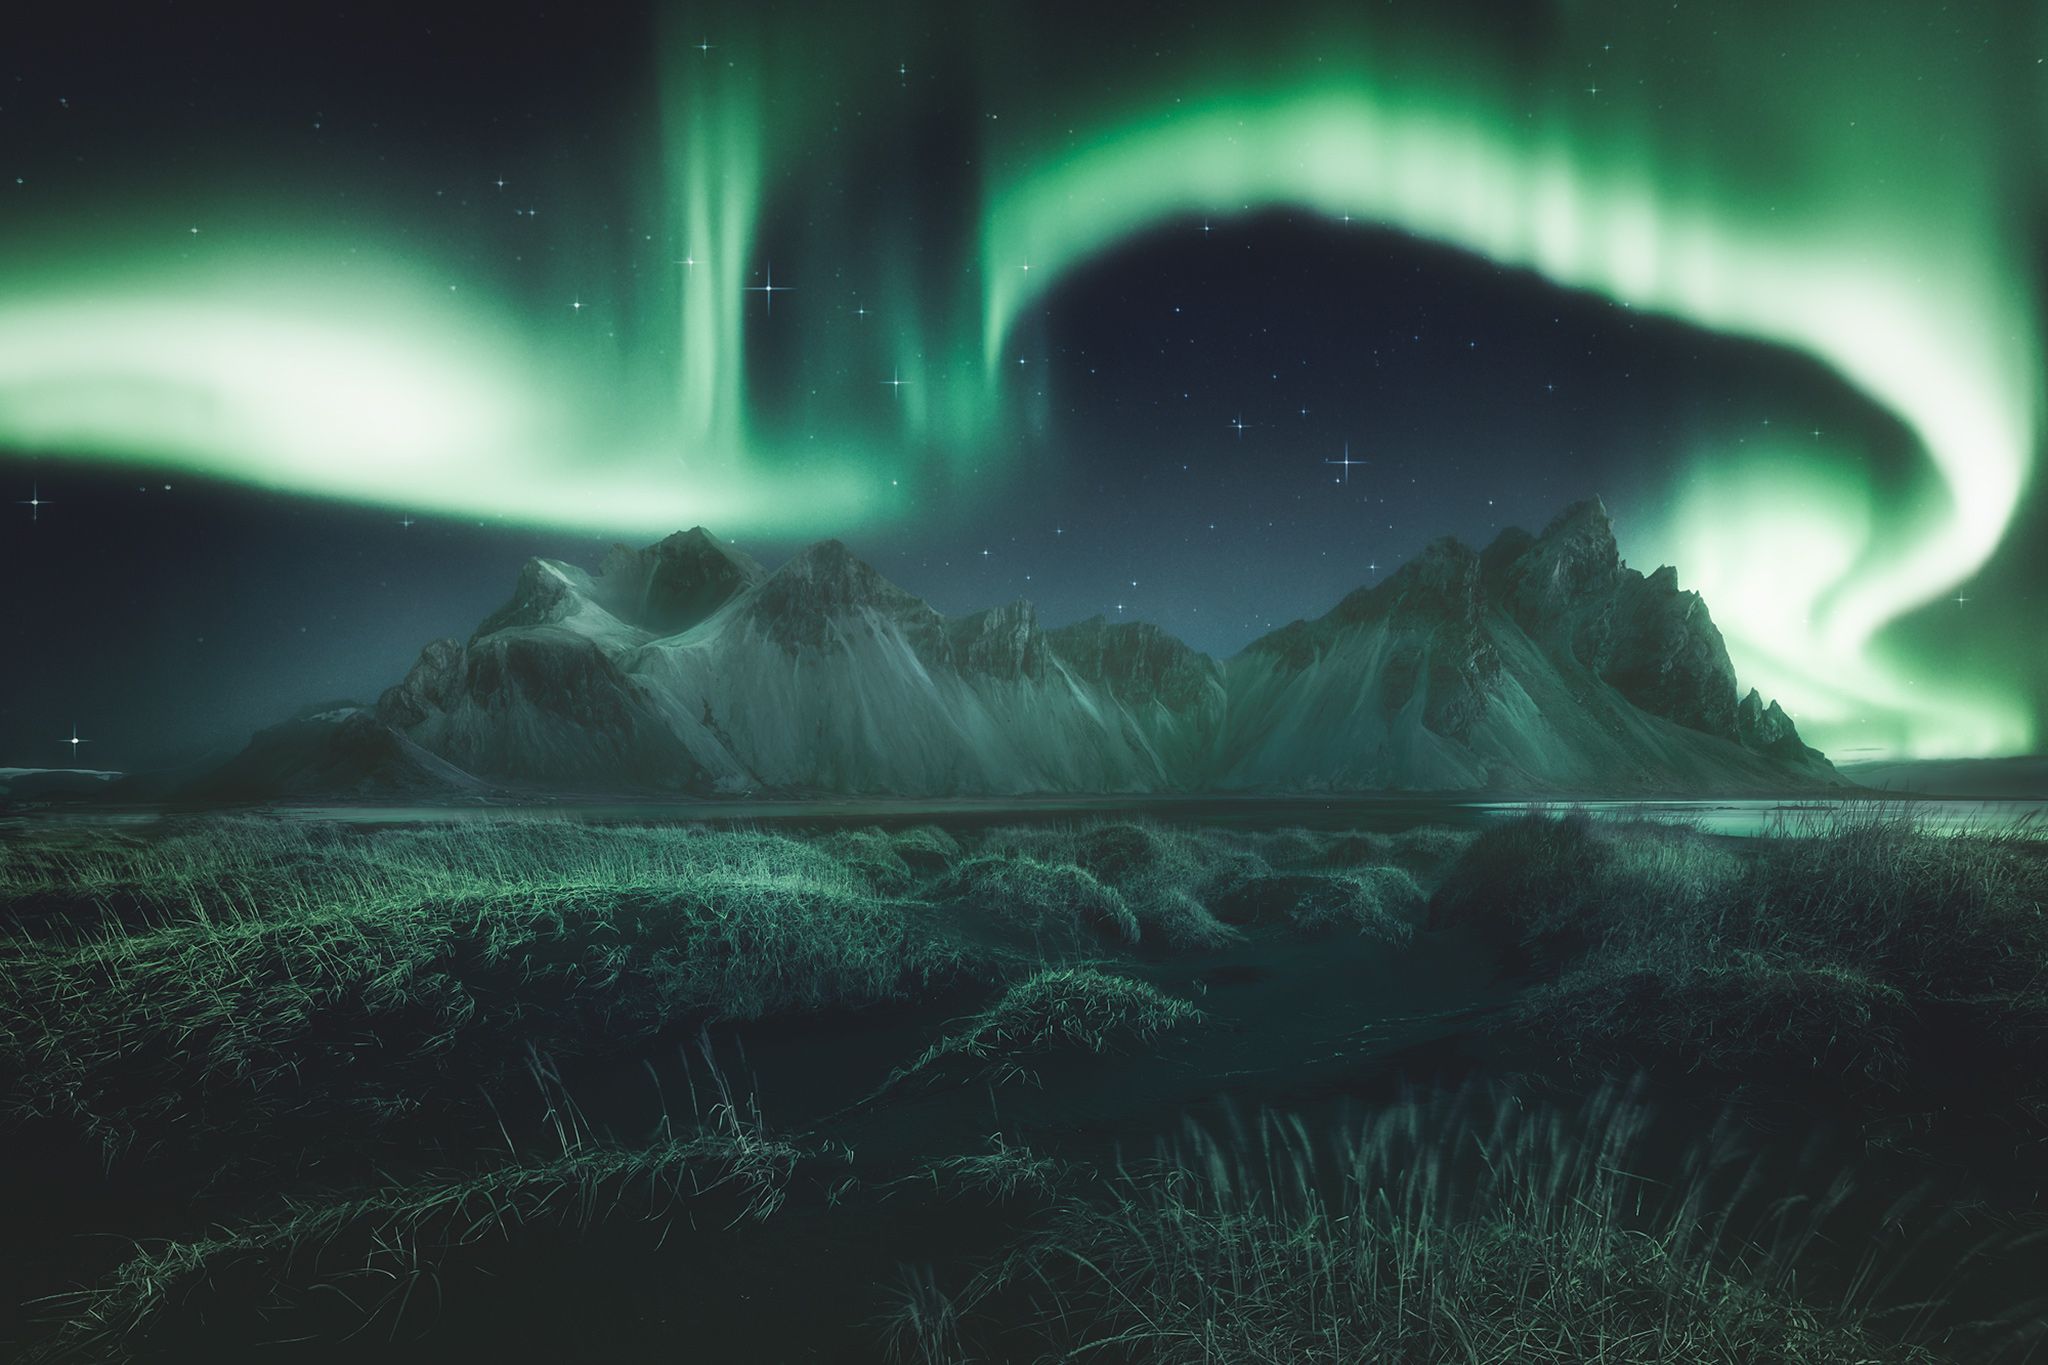
If you ever want to photograph the Northern Lights, then this tutorial contains everything you need to know. Daniel is one of the best professional landscape photographers, explaining his techniques within this article to get the best image from this unique natural spectacle.
Prefer to learn even more about this topic and watch it as a video? Daniel is offering this as an even more in-depth 4-hour video tutorial on his website.
About the Aurora
The aurora is the crown of the (Ant)arctic. Known in the northern hemisphere as the Aurora Borealis (northern lights) and Aurora Australis or southern lights in the antarctic, these brightly colored bands of moving and waving light are a majestic display in the night sky. But what is causing this natural spectacle?
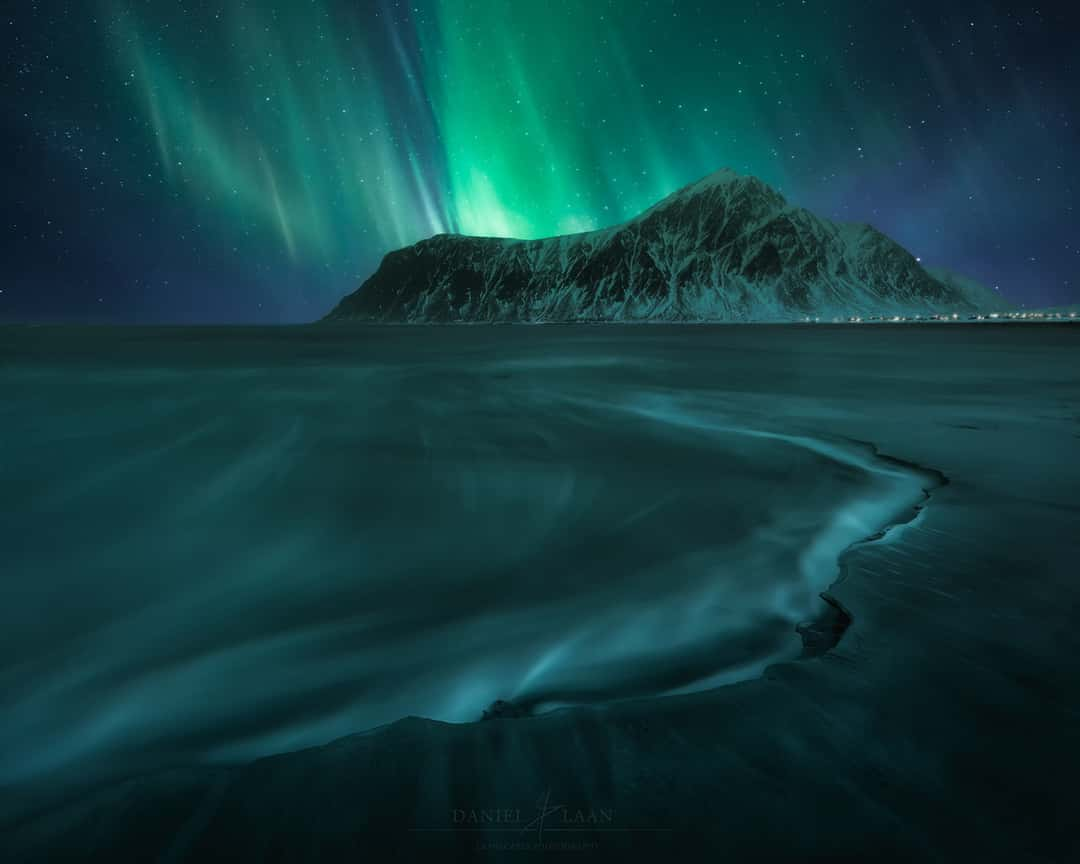
Skagsanden, Lofoten, Norway (2018)
Understanding what the aurora is, helps you to plan your shot because your pretty pictures all start with solar activity. The sun shoots out a constant stream of charged particles which we call the solar wind. When that stream interacts with the Earth’s magnetic field, these particles are led to the north and south poles through the donut-like shape of the field. It’s here where the stream gets concentrated and crashes into particles in the Earth’s upper atmosphere. This is a high-energy reaction that emits light in varying visible colors, which we perceive as the aurora.
The higher the speed of the solar wind, the higher the chance of aurora in the sky.
Solar Flares and Coronal Holes
If you understand that the aurora starts at the sun, you’re halfway there. It takes two to four days for the solar wind to reach Earth, depending on its speed. Basically, we know that more energetic auroral displays are often the result of a hole in the sun’s corona pointed at Earth. This is where the solar wind reaches higher speeds of up to 800 kilometers per second. Perhaps not surprisingly, a hole in the sun’s corona is called a coronal hole.
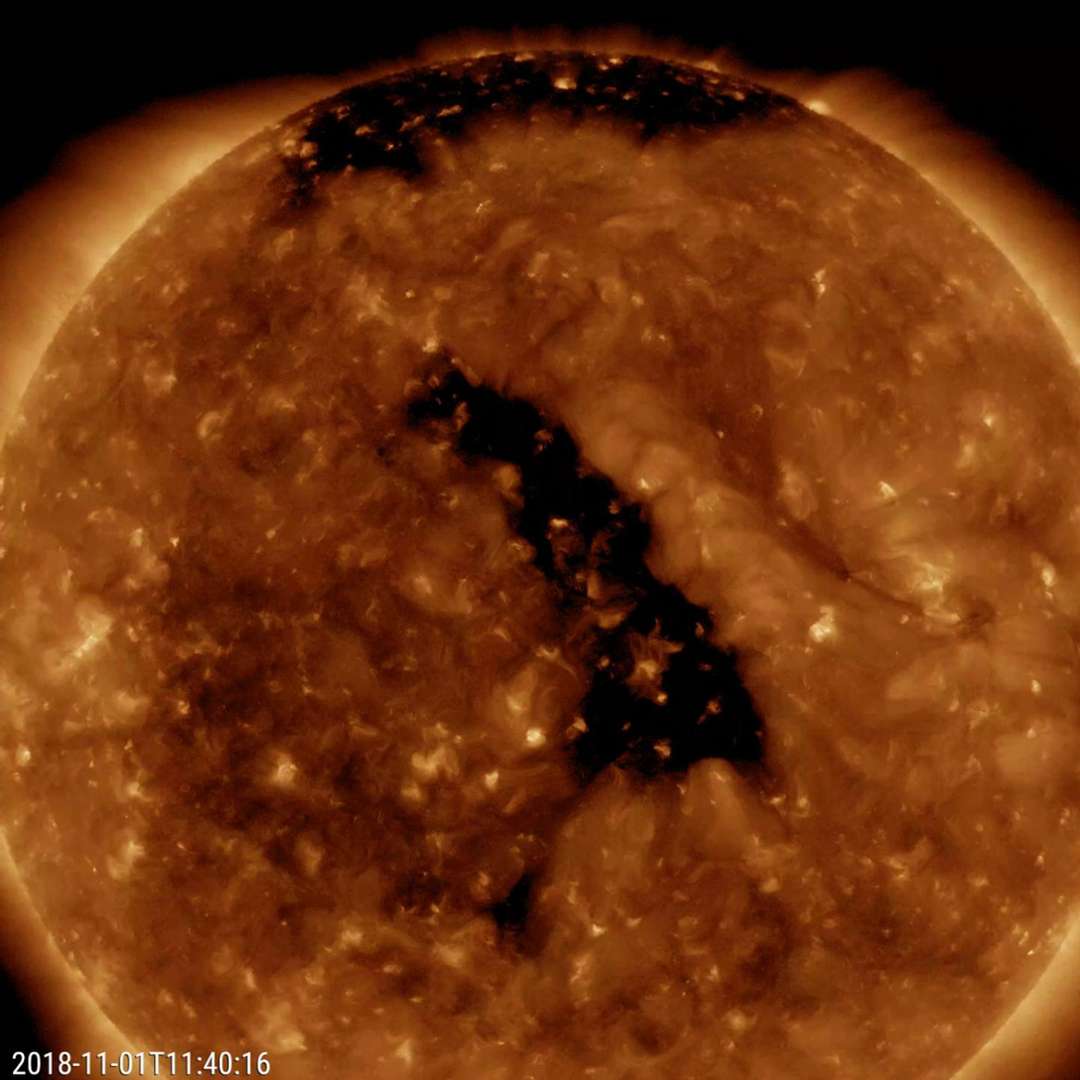
Dark regions are coronal holes. (Video still credit: NASA/GSFC/Solar Dynamics Observatory)
Now that we know that charged particles from the sun interacting with the Earth’s magnetic field are responsible for the aurora, we’ll quickly look at one solar phenomenon that sparks auroras like no other: Coronal Mass Ejections (or CME for short). A CME occurs when a build-up of coiled magnetic energy at the sun breaks into a solar flare and can no longer be held by the sun’s gravity. At this point, a huge blob of charged particles is hurled into space. Sometimes, not even our planet’s magnetic field is strong enough to protect us from CMEs, with damaging consequences. The arrival of a CME on earth is heralded by strong northern lights that on extremely rare occasions can be seen as far south as Cuba.
"Both solar wind and CMEs can be forecasted by looking at satellite imagery."
The Colors of the Northern Lights
It’s often misunderstood that the northern lights are only green. Magenta, blue, and even deep red can be seen and photographed on nights when the aurora is most active. Each gas (oxygen, nitrogen as molecules, and as atoms) emits a particular color depending on the energy of the particles. Because atmospheric composition varies with altitude, the aurora is mostly green at 100 to 240 km due to the charged particles interacting in a certain way with oxygen. Red doesn’t occur much, but when it does during high activity, it develops into red above 240 km altitude due to a different interaction with oxygen. A pink or magenta aurora is a mixture of green and red. Blue and purple are caused by the charged solar particles interacting with nitrogen from our atmosphere. It’s interesting to note that more temperate regions see more colorful displays of the aurora. That is because more energy is needed for the northern lights to be seen farther south. And more energy means more colors. Aside from that, you’re often looking at the aurora from far away, instead of standing under it and looking straight up. Think of this as standing next to a skyscraper trying to count how many stories it has. It’s probably easier to count windows from afar.
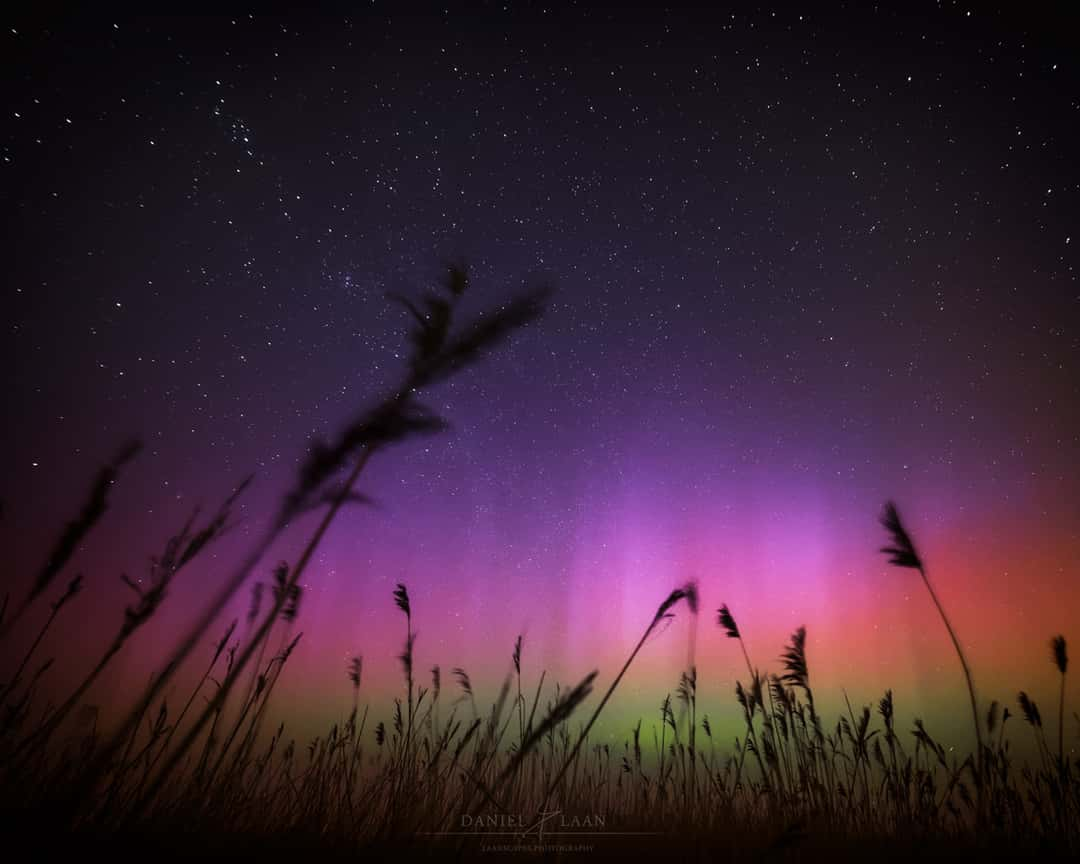
This image was captured in the Netherlands during a very strong geomagnetic storm back in 2015. Notice that the primary color here isn’t green at all, but magenta – a color that is the result of mixing red and green.
Forecasting the Aurora
There are satellites in space between the sun and our planet that measure the solar wind. It takes about 45 minutes to an hour for the solar wind to reach our planet. I use data from this satellite to know if its worth it to go out for photography. I mostly use Spaceweatherlive.com to forecast the northern lights. And if you know how to interpret it, it’s easy to make an aurora forecast for yourself! So let’s talk a bit about the factors that limit or increase your chances to shoot pictures of the magical lights.
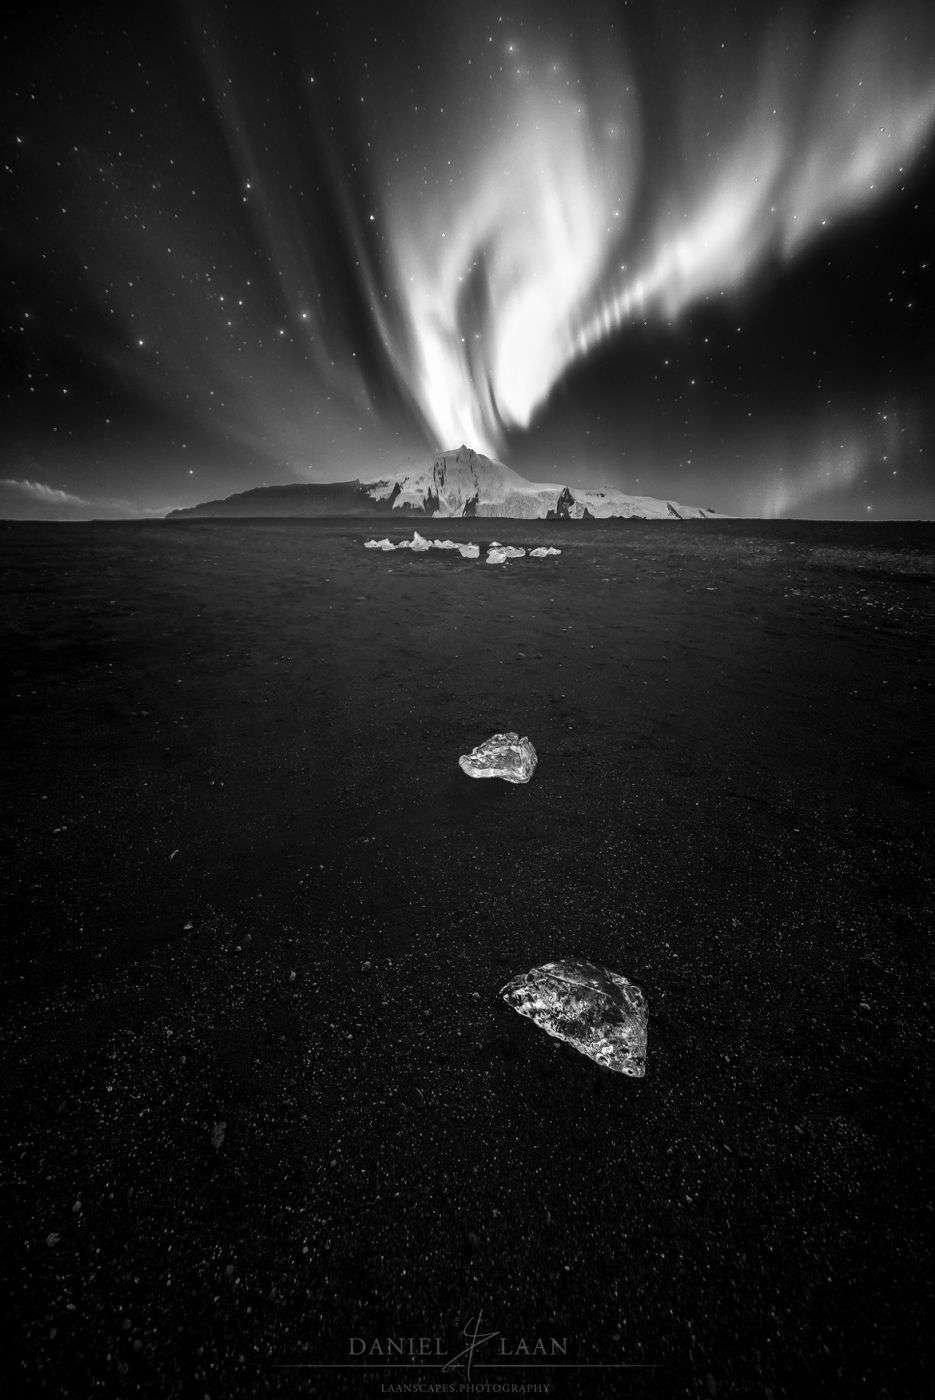
Jökulsárlón, Iceland (2016)
1. Your Location
You’re likely to capture the lights under pristine skies near the Arctic Circle. There’s almost always some green in those skies, given the fact that it’s clear and dark enough (from September to March). Most images shown in this article are all photographed in the Lofoten or in Iceland, except for the magenta aurora in the Netherlands.
2. Kp-index
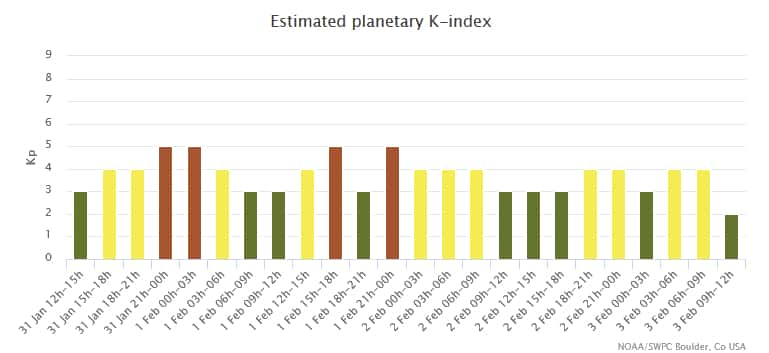
If there’s one thing to learn about forecasting the aurora, it’s knowing how to use the planetary K-index (Kp-index). It’s used to characterize the magnitude of geomagnetic storms. Kp is an excellent indicator of disturbances in the Earth's magnetic field and therefor, potential displays of aurora.
The scale goes up from 0 to 9. Where 5 or more indicates a geomagnetic storm. The further up this goes, the farther south the northern lights may be visible.
3. Bz
The earlier mentioned Kp-index is derived from the maximum fluctuations of horizontal components observed on a magnetometer during a three-hour interval. I don’t expect you to remember that, but in short, it says something about the past three hours. That makes it pretty hard to say anything about how it will look an hour into the future, but scientists are getting better at it. A more reliable way to know if the next hour will spark auroras, is the direction of the magnetic field (or Bz).
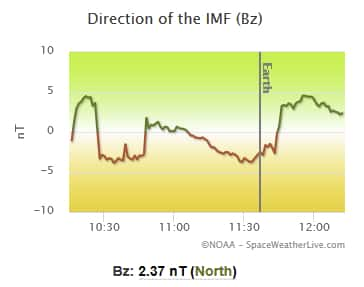
Remember this: When the direction of the magnetic field is south, geomagnetic disturbances become much more severe. In fact, I don’t even try when the Bz is northward. However, this polarity can change at a moment’s notice. And when it does, you have about 45 minutes to get to the location where you want to photograph the lights.
4. Solar Wind Speed
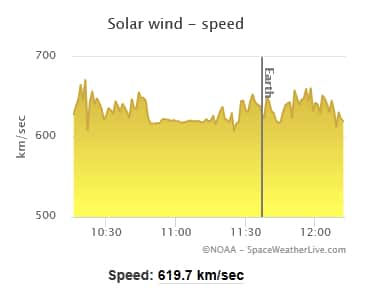
Faster speeds means more interaction with the magnetic field: So stronger northern lights. Normally, that speed is around 375 km/s. When the speed picks up to double that amount, it’s reason to dress warm for the night and head out. Especially if you’re located in the northern United States, South Australia, Scotland or anywhere along those lines. With speeds of around 800 km/s, the aurora might photobomb you when pointed towards the poles if you’re anywhere in Scotland, Scandinavia, Canada or southern New Zealand.
Photographing the Aurora: Camera Settings
The question I get asked the most is what camera settings are used to capture the aurora. Milky Way photography is rather easy to get into, but quite difficult to master. That’s because the settings on your camera are almost always identical. That’s certainly not the case for the northern lights. The dynamic nature of the aurora has you constantly adjusting your settings in order to control the exposure. The steep learning curve of aurora photography starts at setting your camera’s ISO, aperture and shutter speed in the complete dark.
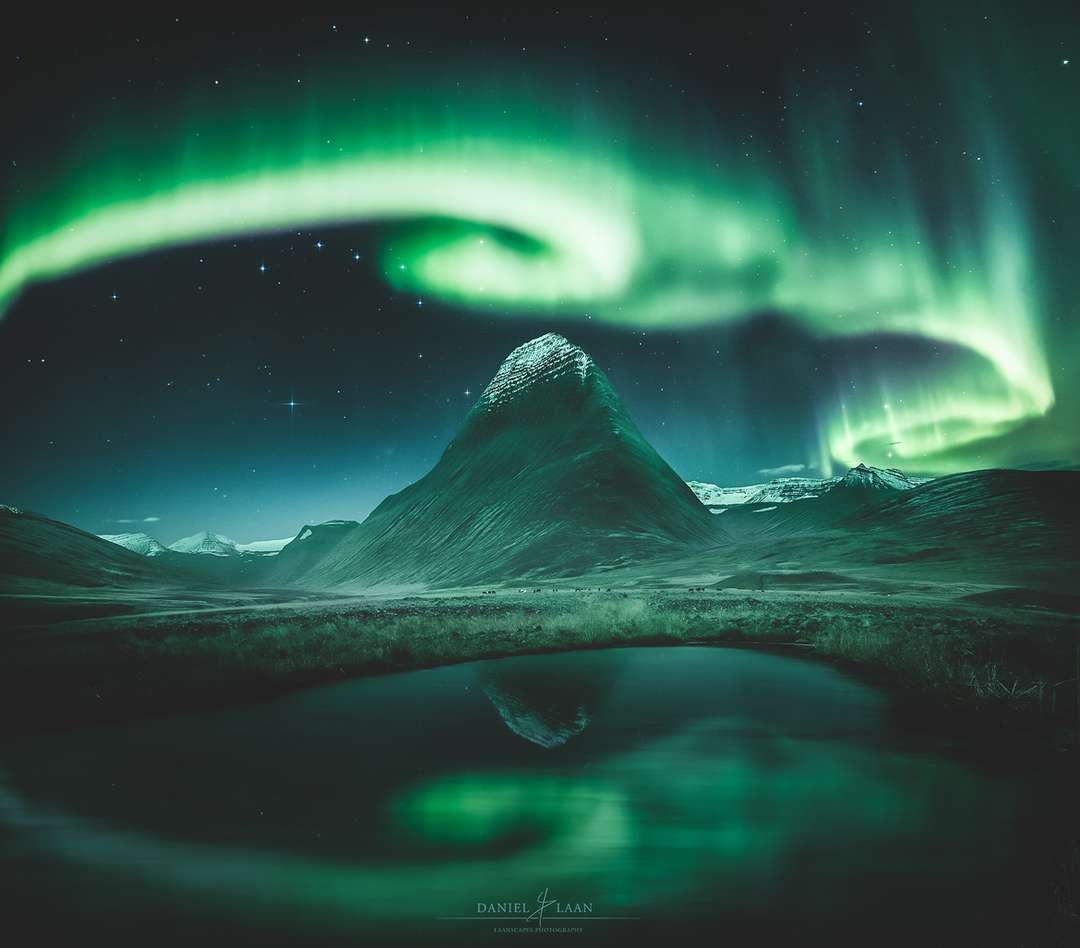
Remote part of northen Iceland, near Varmahlíð (2016)
Especially during a geomagnetic storm, when the lights warps violently across the heavens, you don’t have time to turn on your headlamp, adjust settings and shoot again. And it’s too dark for the auto-exposure to have effect anyway. So here’s a guide to help you prepare:
Tripod & Shooting Raw
It goes without saying that a tripod is mandatory. Due to the longer exposures, you don’t want the movement of the aurora to be influenced by the shake of your hands. Set your camera to shoot Raw images. We will be tweaking the image quite a lot in post-processing and to get the most detail out of there without introducing all sorts of noise and artifacts, you will have to shoot in Raw.
Focal length
Make it as wide as possible. Think about 14-20 mm or even a diagonal fisheye on a Full Frame camera. That way you can image the largest structures of the aurora.
Aperture
Again, go as wide as possible. This is because we’re looking to capture detail in the shape of the aurora, so priority goes to shutter speed and lowering the ISO. f/4 at the minimum.
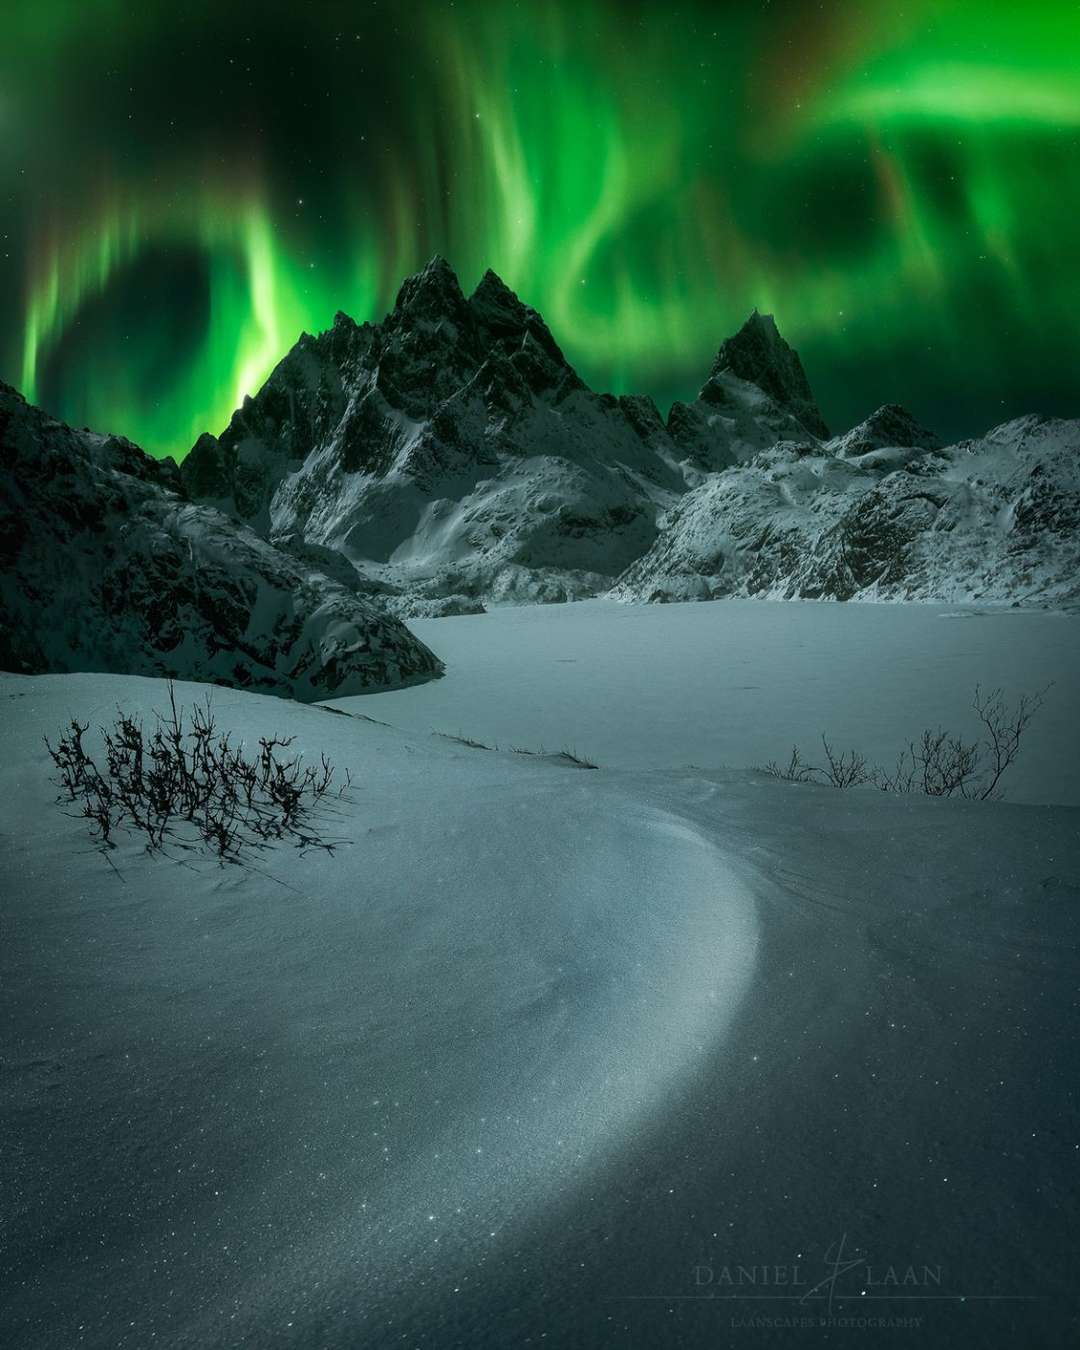
Full moon illuminating the foreground – Frozen lake in the heart of the Lofoten, Norway (2018)
Focus
Because we’ve set the aperture to a wide setting, it’s imperative to set the focus to manual and focus right before the infinity mark. That way you can have some reasonably sharp outlines of distant objects like mountains in your frame, which add to your composition. Oh, and turn off any stabilization you might have on your lens or body. That is counterproductive when you photograph from a tripod.
ISO
The best advice I could give you on any camera as a beginner, is to start at ISO 3200 and adjust it from there. Some cameras can produce clean looking results at 12.800 or even higher, so it’s best to experiment a bit with this until you are happy with your result. I typically use ISO 800 on a Nikon D750 and boost the exposure in post if necessary.
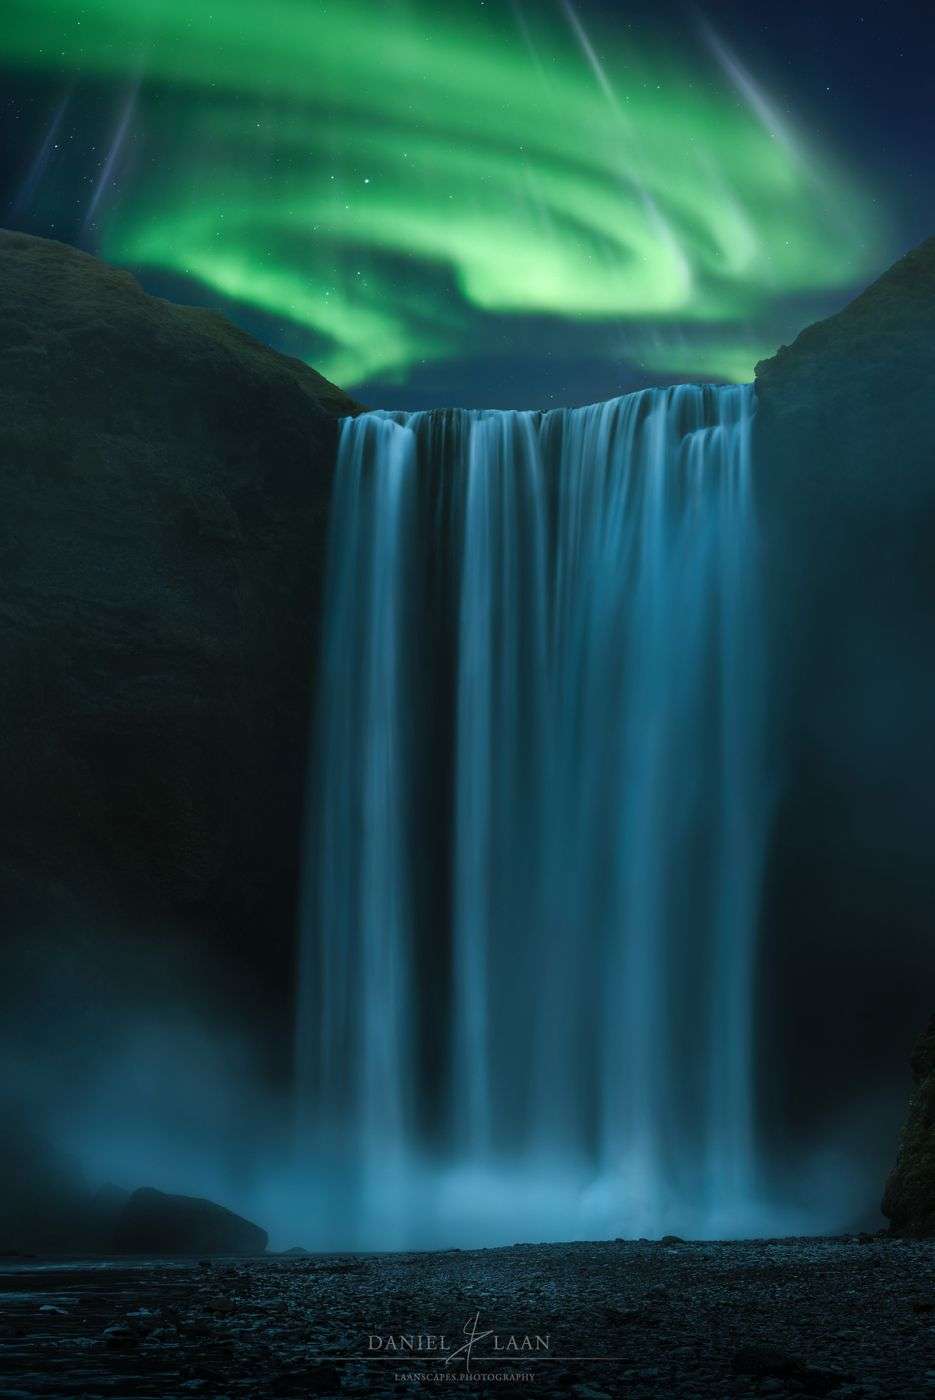
Skogáfoss, Iceland (2016)
Shutter Speed
The single most important thing to control during active northern lights, is the length of the exposure. Your goal is to find the equilibrium between structure (shorter exposures) and brightness (longer exposures). In as far south as the Netherlands, I’ve been happy with 10 second exposures, but in Iceland, that would have completely blown out every highlight. The shortest I got there at ISO 800 was at 1.6 seconds. My advice: start short at 2 seconds. That way you will only have to wait two seconds to judge the image and composition and shoot the next one. If you would have to wait 25 seconds and see that your image is blown out, you might miss that one shot where the composition was just perfect.
Post-Processing the Aurora
With a memory card full of memorable shots, it’s time to tweak those sliders to get the most out of our northern lights. Personally, I want to create images that I enjoy looking at. So I’m embracing artistic freedom with any photo of the northern lights or other landscape.
Step 1: Raw Conversion
There isn’t much detail at all in the original image. That’s because I shoot my aurora images at a faster shutter speed while keeping the ISO lower. That will underexpose your image, but for Nikon, Sony, and Fujifilm, it’s good advice to do so in night photography. If you shoot Canon, you’re better off raising the ISO and not increasing the exposure too much in post.
Set the white balance to about 4000K if you haven’t already done so before exposing. This will create an overly blue image, with some turquoise in between the dark blues and green highlights which I personally quite like. Turn on noise reduction and drag the amount to about a quarter of the length of the slider. More than half if you shot your image at ISO 6400. Rotate your image if your horizon is not level and raise the shadows to allow some detail (but not much) into the frame. Lower the highlights if your photo is slightly over-exposed. Raise the whites when you have underexposed the image, followed by an increase in exposure. Doing this will make your highlights stand out more than just raising the exposure. In any case, keep an eye on the histogram. Don’t blow out the aurora! Slight highlight clipping in the stars is ok.
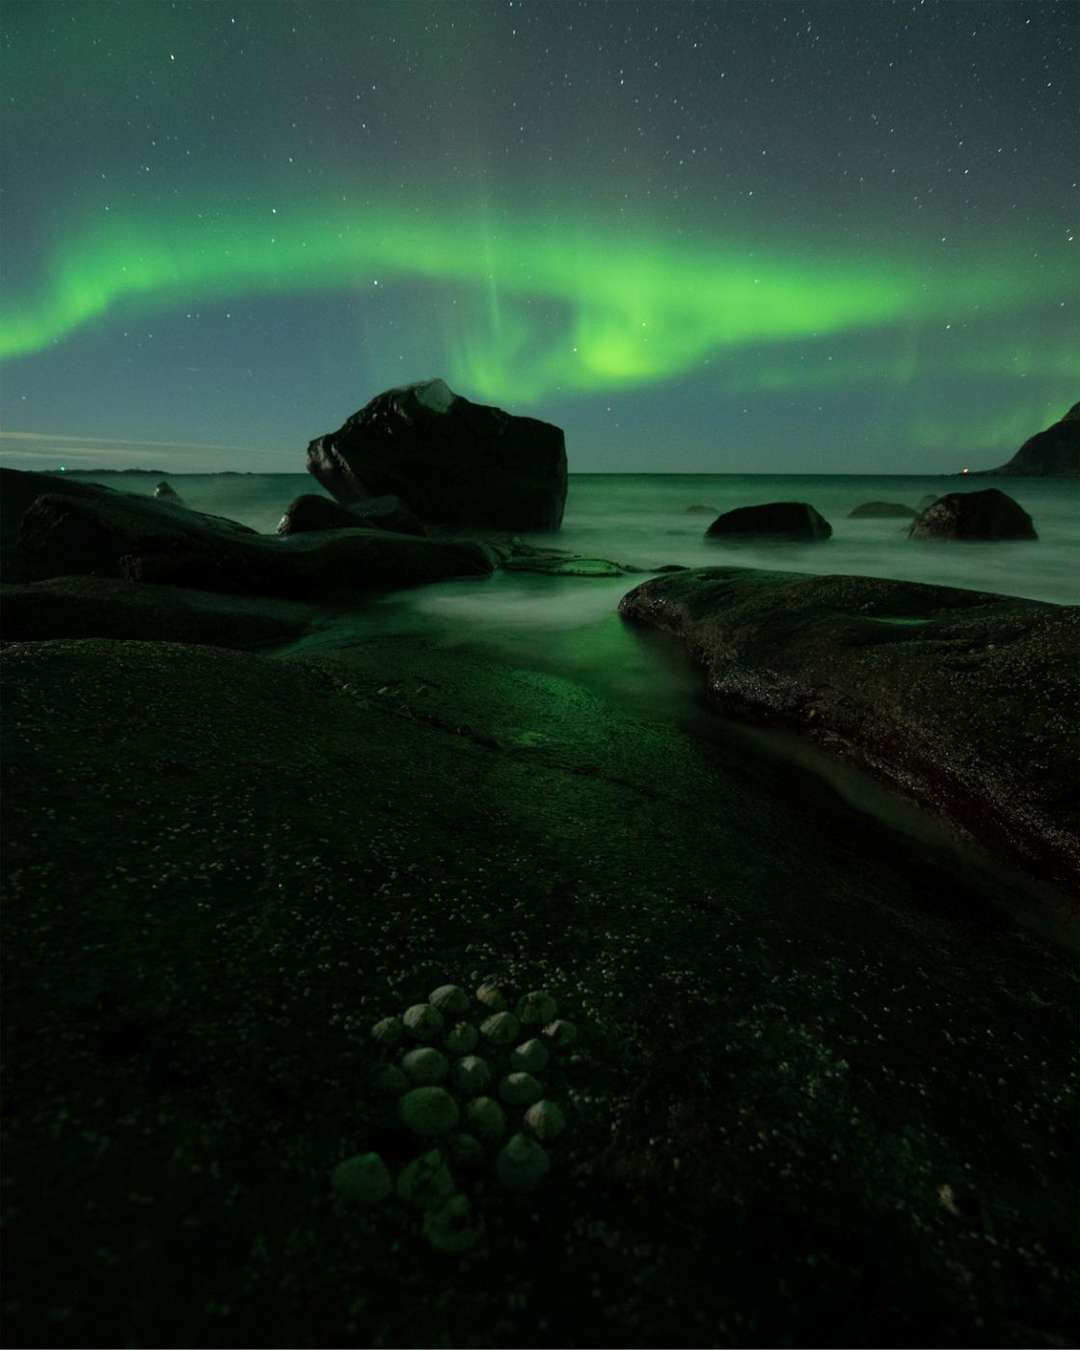
If your exposure looks somewhat like this after Raw conversion, you have all the data you need for post-processing. Note that the sidelight on the shells and rocks in the foreground is coming from the full moon rising to the left of me in this image.
Step 2: Focus Stacking
The image we’re working on has been focus-stacked to create a dramatic, sharp foreground as well as pinpoint stars. Focus stacking is a technique in which you set your focus distance at various settings over the course of multiple exposures.
You will need a lot (~ 20) exposures at f/2.8 to make a sufficient focus stack that will have everything from minimum focus distance to infinity as sharp as possible, so I suggest you lengthen the shutter speed to 30 seconds and close the aperture a bit to f/5.6. As long as you don’t forget to open the aperture and shorten the exposure for the aurora.
I’ve manually blended each layer in Photoshop to get the resulting image:
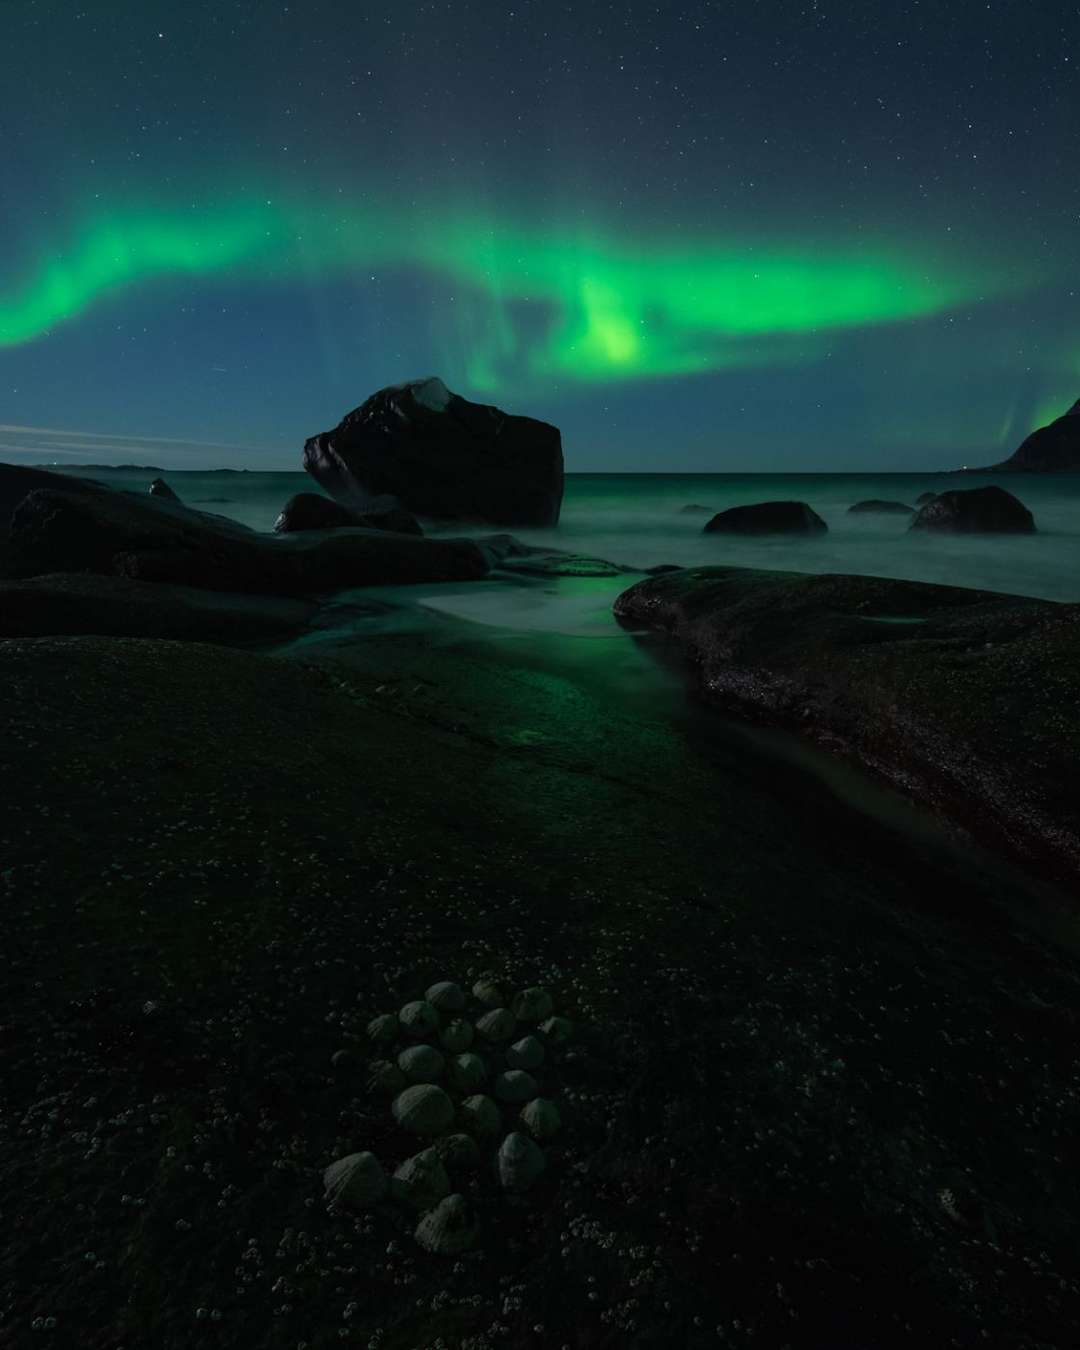
The aurora and the light on the foreground shells in step two look a bit different from the previous step because it’s a focus stack. The sky is an exposure taken a bit earlier and the foreground is taken later, allowing the moon to illuminate the shells more and have everything in sharp focus. Even at night.
Step 3: Mixing all Exposures
With the focus stack in place, I want to emphasize certain areas more. At one point during focus stacking, I remembered capturing a better mid-ground where the surf of the ocean created a mystical atmosphere. Looking through every layer, I found one that creates a much stronger composition with more mid-ground interest.
As for the aurora, I ran a workshop during the creation of this image and I left the tripod in exactly the same place while explaining the focus stack technique to a student. At some point during our conversation, the aurora burst into green flames and I pressed the shutter a number of times while focused on the sky. Needless to say, I chose parts of that layer for the sky.
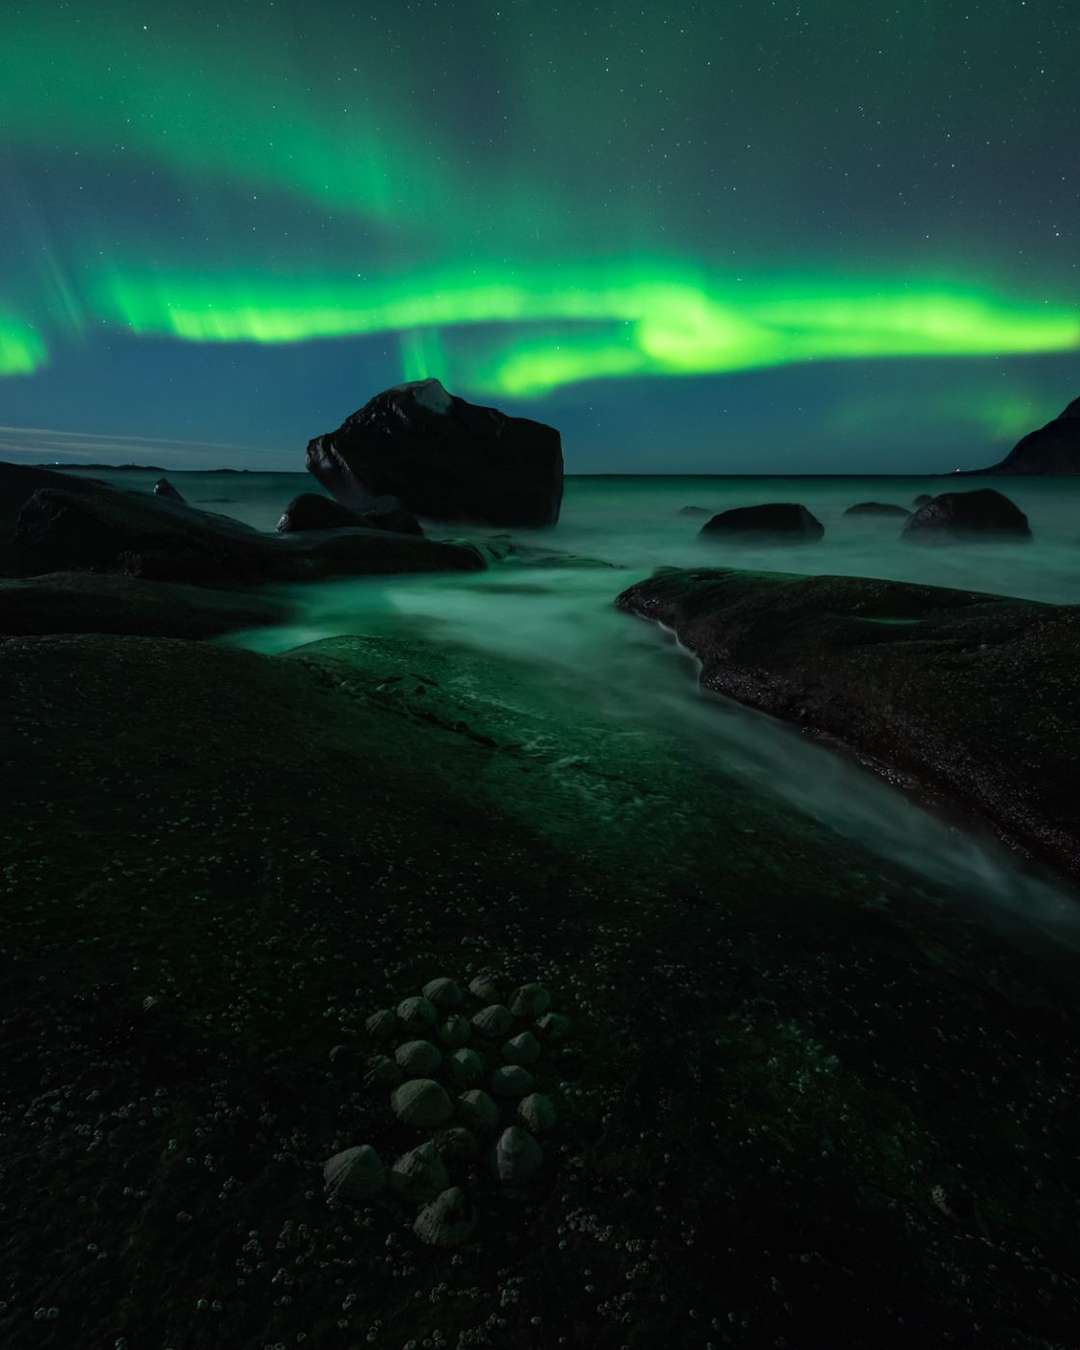
Photographing the northern lights with a focus stacked foreground can mean either of two things. The most spectacular aurora can happen while you’re busy running the foreground focus stack, or it can happen at exactly the right moment. In reality, the latter almost never happens, so you will have to wait for an opportunity to capture the best shapes in the sky that complement the foreground.
Step 4: Transformations
The composition is slightly out of balance. So what I did next, was stretch (warp tool) the bottom part contains the shells towards the bottom left. That enlarges the shells without having too much of an impact on the horizon. Speaking of which, I’ve also stretched the right part of the image outside the frame. The mountain in the background unbalances the composition too much.
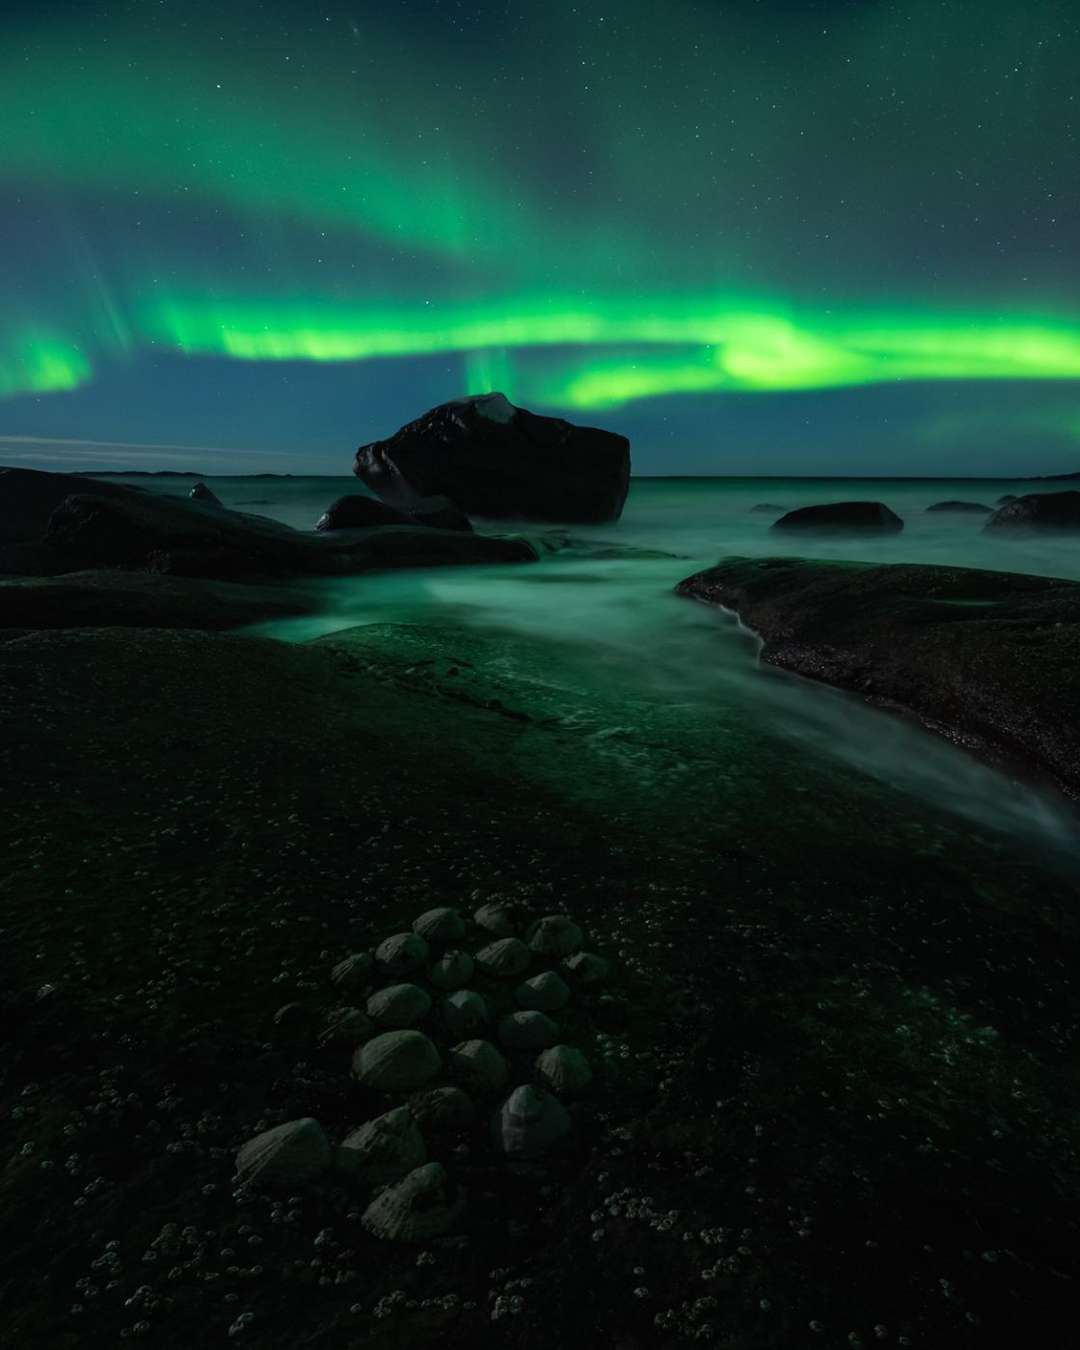
If you think that warping or using multiple exposures crosses your personal boundary of post-processing ethics, reconsider taking the widest possible lens with you. A tilt-shift lens can do exactly the same for you, but there isn’t a wide f/2.8 tilt-shift lens out yet. Note that a tilt-shift lens can cost € 4000.
Step 5: Dodging and Removing Oversaturated Blue
With the help of Tony Kuyper’s Rapid Mask 2, I’ve increased the exposure of the water, adding to the mid-ground interest. I’ve also decreased exposure in the sky, to increase contrast between the night sky and the aurora. I’ve dodged the aurora a bit to reveal faint reds above the greens and make this shot more dramatic. Lastly, I’ve decreased the saturation of the blues, rendering an almost black-and-white scene with some greens. This is the feel of the image that I want to end up with.
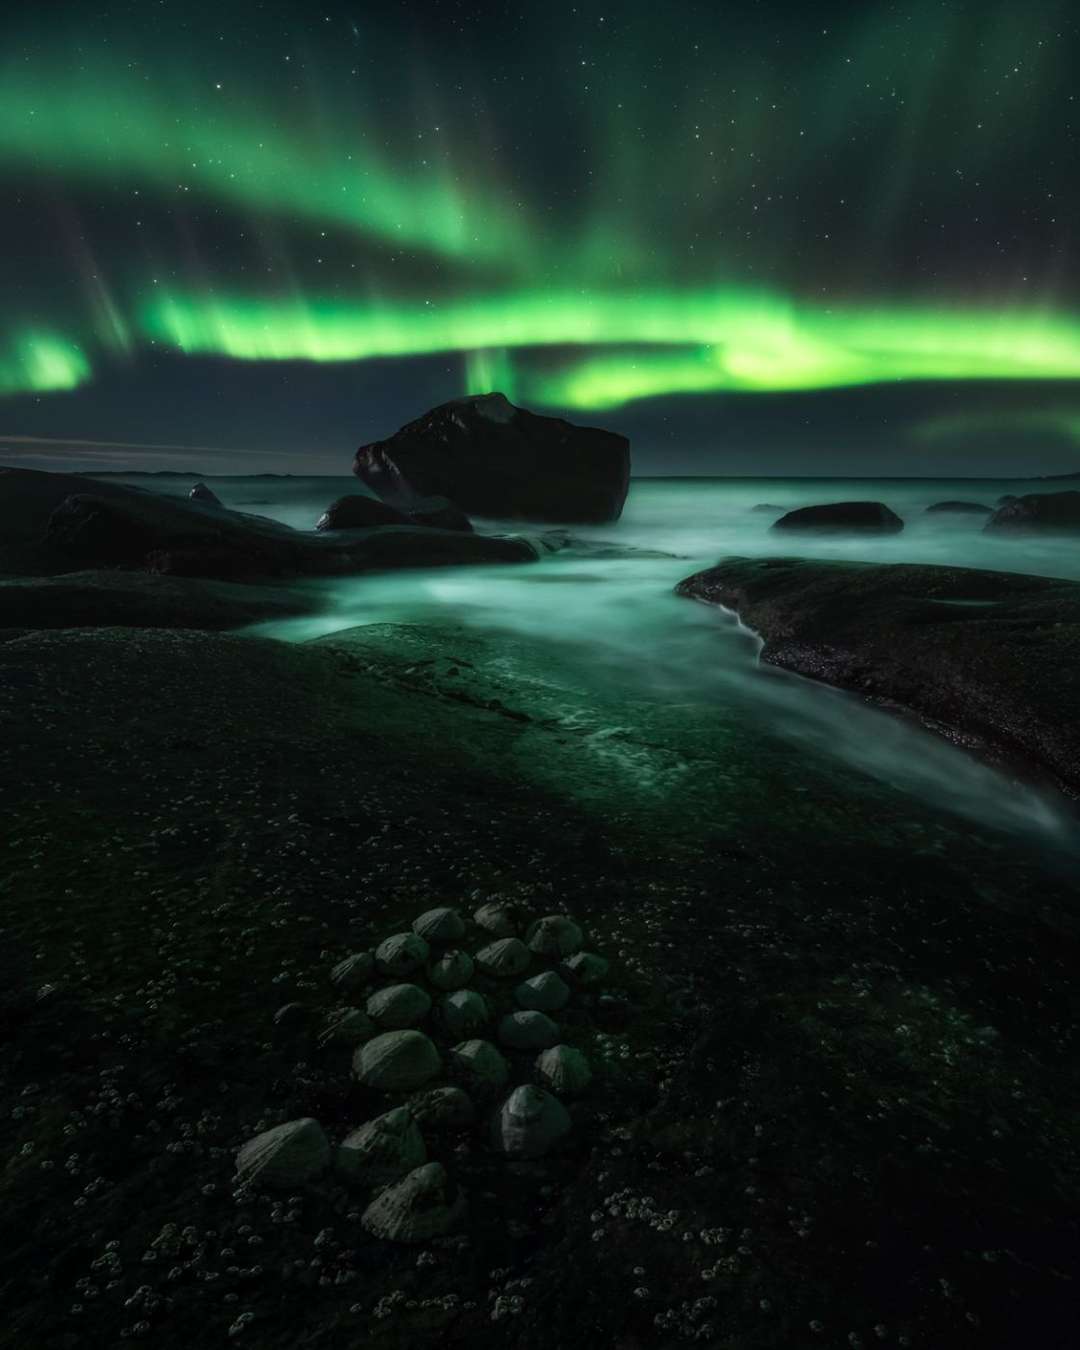
Consider converting your image to black and white to really pay attention to your image’s luminosity. Switch the layer blending mode to “Luminosity” for dramatic effect.
Step 6: Brighten up areas of interest
Before finishing your landscapes featuring the northern lights, it’s important that you pay close attention to any areas of interest as well as areas that demand attention but shouldn’t. One way of doing that is cloning out distractions along the edges of the frame or adding a dark vignette to keep the viewer’s eye in the center.

For this last step, I’ve brightened up the foreground just a bit and dodged some additional auroras. The 14mm lens’ distortion creates a direction in the sky that seems to be pointing toward the big boulder in the center of the frame. Through dodging selectively, I’ve emphasized that sense of direction. Uttakleiv beach, Lofoten, Norway (2018)
I love to combine the tricks of post-processing with photography as my canvas to maximize the fine art potential of any landscape image.
So this is how I go about post-processing my auroras. Hope you’ve picked up a trick or two and if you want to learn even more, definitely make sure to check out my various video tutorials.
##4-hour Aurora Post-processing Video!
If you want to see me process this image from start to finish in both Lightroom and Photoshop, then consider my complete northern lights post-processing tutorial, available on my website. This video is for everyone, whether you’re new to Photoshop or a seasoned user. In this 4-hour editing video, I will teach even more techniques and a lot of tricks more in-depth.
And if you’re interested in more of my processing videos, be sure to use the "4for3" discount code at checkout! Add four videos to your cart, and pay only three.
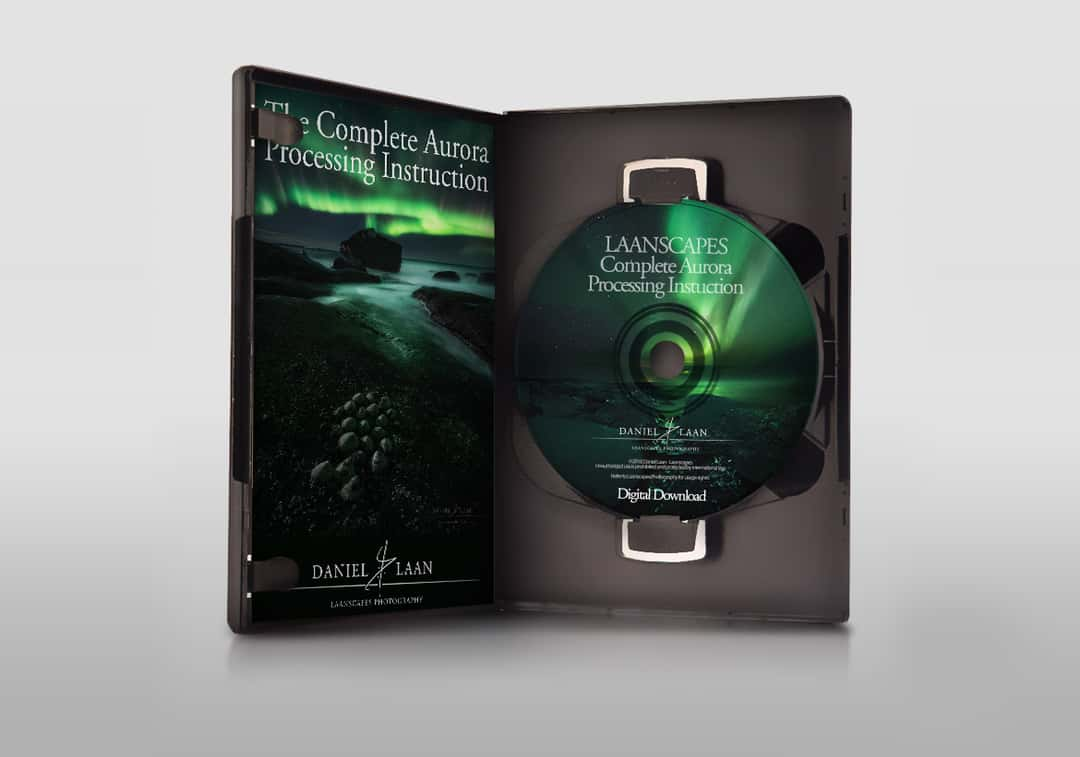
This video is for everyone, whether you’re new to Photoshop or a seasoned user. In this 4-hour editing video, I first introduce you to editing a single image in Lightroom to get the basics down. After that, we use that knowledge to recreate the vision we had at sea in the Arctic Circle.
About Daniel Laan
Daniel Laan is a professional landscape photographer from the Netherlands, who is passionate about conveying ethereal qualities through both photography and post-processing. His turbulent mind finds serenity in the outdoors and his work comes alive through a dark and moody visual style. Daniel teaches fine-art landscape photography on location during exciting workshops.
Sources on the Aurora:
NOAA Space Weather Prediction Centre
Dr. Vincent van Leijen
Spaceweatherlive.com


Comments (5)